No Comments Git

[Git] Automatically add branch name on commits.

In order to have a more readable log, I generally prefer to add the branch name in each commit. It gives something in this flavor:
[myCurrentBranch] Some interesting things I fixed.
But it’s a pain to manually add it each time. Moreover each thing you manually do is human and then error prone. Let’s automatize that as good and lazy engineers / programmers as we are…

HowTo:

In your repository, rename the hook .git/prepare-commit-msg.sample to .git/prepare-commit-msg
Add the following code just before the “case”:
branchName=`git rev-parse --abbrev-ref HEAD`
echo "[$branchName] " > "$1.msg"
cat "$1" >> "$1.msg"
cat "$1.msg" > "$1"

Less things to type! Hurray!

No Comments Git

[Git] Remember credentials on git operations

Tired of entering your ID / password each time you do a git operation?
Here you go if you are on Windows:

Note: if you are using CygWin, you may change the following block with a CygWin style path:
[credential]
helper = !'C:\\Users\\myUserName\\AppData\\Roaming\\GitCredStore\\git-credential-winstore.exe'

into
[credential]
helper = !'/c/Users/myUserName/AppData/Roaming/GitCredStore/git-credential-winstore.exe'

No Comments Git, IT

[Git] Git 1.8 or higher in cygwin

Why update cygwin default git (v1.7.4)?

=> in the old version, git pull will linearize your history if you have a merge commit in it.
An alternative for that is:
git fetch
git rebase --preserve-merges

Do you want to have so much commands? Neh
=> in the 1.8.5, you only need to do that one time and then normally use git pull:
git config pull.rebase preserve # Do it one time

How To?

git clone https://github.com/git/git.git
cd git
git checkout v.1.8.5 # Or any version you want

In Makefile, replace the following line:
MSGFMT = msgfmtby
MSGFMT = msgfmt.py

make configure NO_MSGFMT_EXTENDED_OPTIONS=1
./configure
make NO_MSGFMT_EXTENDED_OPTIONS=1
make install NO_MSGFMT_EXTENDED_OPTIONS=1

Troubleshooting:

  • You will need the following packages from cygwin installer:
    • iconv-devel
    • make
    • dos2unix (optional)
    • autoconf
    • zlib-devel
    • libcurl-devel (otherwise https protocol won’t work. It is widely used by host providers. e.g: GitHub, BitBucket, …)
  • If it complains about some “\r”, change the endline of the concerned files with dos2unix
No Comments IT, Productivity, Tuning

[Productivity] FreeCommander: another explorer alternative

TL;DR: FreeCommander and Replace “Win+E” shortcut to open it (start from point 3).

For a long long time, I have been using Explorer++. It was a really nice improvement from the native Windows explorer but I was not totally happy of it though.

If you ever used Explorer++, then you might have already felt the pain of opening a directory, a simple task that might take ages. And when it is not frozen, it might simply crash, making you lose all these so precious tabs you frenetically opened during your session.

You, if you are also frustrated by Explorer++ – or even if you are not – have a try with FreeCommander. Its GUI is a bit different, it would remind FileZilla to some of you, but it is really handful for browsing and copy / pasting operations with its two panels and tabs. The shortcuts might look weird at the beginning but you really quickly get used to it.

1 Comment AS3, IT, Work

[Work] Recommendation Letter from the IPB (Portugal)

IPB - Recommendation letter

Recommendation letter from the Instituto Politécnico de Bragança (Portugal).
I really had a good time there and I am really proud of the level my students could achieve in such a short time!

1 Comment IT

[Keyboard] Programmer dvorak + autohotkey = Typing APM overdrive!

Most people are used to work with keyboards mappings like qwerty or azerty, but there is some mappings that are more optimal to work with. In this post, we will have a look to Programmer Dvorak keyboard mapping and some AutoHotkeys to improve your efficiency while coding.

HowTo:

  1. Install Programmer Dvorak keyboard mapping
  2. To ease your Programmer Dvorak learning, print a layout model and put it below your screen so you can have a look at it while typing
  3. Install AutoHotkey and run this script, this will add some hotkeys to improve your Programmer Dvorak experience. Make sure that NumLock is disabled otherwise the hotkeys won’t work

List of hotkeys (emulated key: physical key):

  • Ctrl: CapsLock. While coding, I rarely use CapsLock contrary to Ctrl key. Moreover physical Ctrl key is too much far away from pinky finger and it quickly becomes painful (especially when coding with emacs like editors), so having a Ctrl instead of CapsLock is really handy
  • Arrows: AltGr (or Right Alt) + (c, h, t or n). The thumb is overly unused whereas it is the strongest finger of the hand. Use your right thumb to push AltGr and fingers from the same hand to move with the arrows. If you want to add modifiers (combinations of Ctrl, Shift and Left Alt) you have to push on AltGr, then on the modifiers and finally on the letters for the direction.
  • BackSpace: Compose Key. The Compose Key is usually just on the right of the left shift key. You might have the compose key only if your keyboard is an Azerty or an European style keyboard. One could change the key to be Delete instead of BackSpace according to your habits.
  • Home: AltGr + g
  • End: AltGr + r
  • PageUp: AltGr + m
  • PageDown: AltGr + v

The goal of these shortcuts is to avoid to remove the fingers from the letters keys. Indeed the more you move your hands from the letters, the more you waste time and hurt your arm / hands / fingers. You may try to follow these rules:

  • Use your pinkies to push on Shift / CapsLock (remapped as Ctrl) keys
  • If your keyboard is ergonomic enough for it, use the thumbs to push on Alt keys
  • If your keyboard is ergonomic enough for it, use your palms to push on modifiers /  Context Menu key
  • Avoid to use your mouse (use Context Menu key whenever possible)
  • Avoid to use the NumPad
  • Avoid to use the right part of your keyboard (NumPad, Arrows, PageUp, PageDown, Del, …), use the above shortcuts instead

Note: The AutoHotkey script is not yet perfect, sometimes the CapsLock key might be blocked, I usually roughly solve it by bashing on AltGr+CapsLock keys…

If you want to go further, you may have a look to foot pedals, it is sometimes used by emacs / vi / vim users as modifiers…

No Comments IT, Tuning, Windows

[Tuning] iTunes Multimedia Keys

You are on Windows, you like iTunes but your “Play / Pause”, “Next” and “Previous” multimedia keys are not working for it?

Try to install mmkeys.dll.

If the mmkeys.dll trick does not work for you, as it didn’t for me, you may try iTunesControl:

  1. If your laptop is not an Asus (specifically a G73J), go directly to the step 6.
  2. Install Asus notebook keys v1.3 to enable your multimedia keys.
    By default they only work with Windows Media Center / Player (for this point, Asus really sucks…).
  3. If you are running Windows 7, do this step to fix the “Can’t synchronize with existing ATK0100 event!”.
  4. Launch AsusNbKeys.exe. It won’t display anything and it’s normal.
  5. Launch AsusNbKeysCtrl.exe and customize your multimedia keys. You must specify a keystroke (e.g.: Ctrl+Alt+Shift + down arrow = play) for each event.
  6. Install and launch iTunesControl. With some configuration, here the kind of interface you can have:
  7. [Optionnal]
    1. You may disable some Windows features like the Magnifier to set the “Win+-” or “Win++” shortcuts to Volume Up or Volume Down for example. To do so, use a autohotkey script:
      #NoEnv  ; Recommended for performance and compatibility with future AutoHotkey releases.
      SendMode Input  ; Recommended for new scripts due to its superior speed and reliability.
      SetWorkingDir %A_ScriptDir%  ; Ensures a consistent starting directory.
      
      ; Disable Magnifier.
      #NumpadAdd::return	; Magnifier zoom.
      #NumpadSub::return	; Magnifier dezoom.
    2. Create a shortcut to your autohotkey script, then cut and paste it to your startup directory (on Windows 7: C:/programdata/microsoft/windows/start menu/programs/startup).

Note: the iTunes style I’m using is Silent Night by Davi-1.

2 Comments IT, Tuning

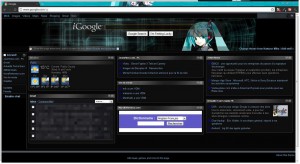
[Tuning] Another iGoogle dark theme for Stylish.

If you don’t know Stylish, you should try it if you are a fan of these eye-candy things on your browser! What it does exactly is to override default websites CSS with custom ones you can create or find here for example.

You can download here my CSS for iGoogle.

It’s a merge of “Dark IGoogle Mine” and “Google – Dark Shiny Blue, transparency” with some fixes and customization.

Another iGoogle dark theme

Another iGoogle dark theme

1 Comment IT, Tuning

[Tuning] WinSplit Revolution

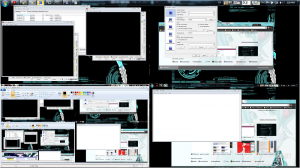
I’m currently working on a project that ask me to have three debuggers, two applications and a command shell running at the same time. I cannot put all these windows on different virtual desktops as I need to always see all of them. So, before using WinSplit Revolution, I was manually resizing the windows each time I was compiling, and it was really a pain…

With WinSplit Revolution, you can position your windows quite intuitively with shortcuts using the NumPad. e.g.: “Ctrl+Alt+4” to put on the left, “Ctrl+Alt+6” to put on the right… You can also resize them by 50% (like the native windows 7 built-in feature “Win+left” and “Win+right”), 33% or even customizable parts size of the screen.

Note1: If WinSplit Revolution crash when you try to position you windows, try to reinstall using the portable version.

Note2: If like me you use Chrome, you may want to disable some Chrome shortcuts that conflict with WinSplit Revolution. I’m thinking to the “Ctrl+1”, “Ctrl+2”, … shortcuts that open the Xth tab of Chrome. In my opinion, they are useless Chrome shortcuts. To do that, install Shortcut Manager on your favorite browser.

WinSplit Revolution scheme

No Comments IT, Tuning

[Tuning] Virtual desktops.

If you are a Windows user and have also touched a bit of the Unix world, you may have noticed that Windows lacks the virtual desktops feature. With virtual desktops, you can put your windows and your icons on different desktops. It’s very useful especially when you have a lot of windows.

Dexpot is one of the multiple software that meet this demand. It is simple to use and you can even add a “Cube” effect when you change of Desktop, like Compiz Fusion on Ubuntu for example.

dexpot window preview